Uploading Files Using DirectAdmin's File Manager
DirectAdmin provides a simple and efficient way to upload files to your hosting account through its File Manager. Follow the steps below to upload your files quickly:
Steps to Upload Files
Step 1: Log Into DirectAdmin
- Sign into your DirectAdmin control panel using your credentials.
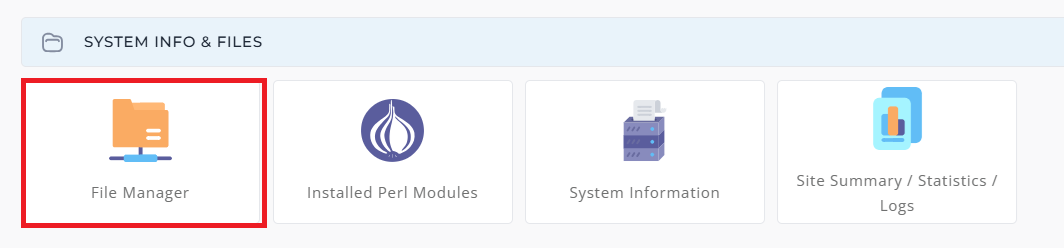
Step 2: Access the File Manager
- In the dashboard, click on the File Manager icon. This will open the file management interface where you can browse and manage your website’s files.
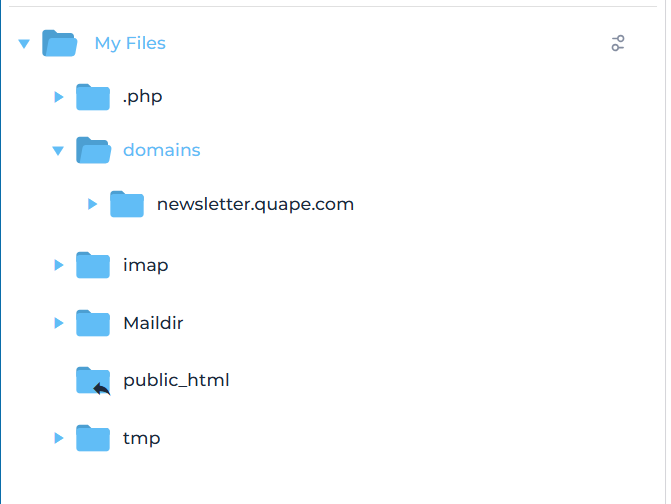
Step 3: Navigate to the Desired Directory
- Once in the File Manager, navigate to the directory where you wish to upload your files. Use the folder structure on the left to select the right location.
Step 4: Begin Uploading Files
- Click on the Upload files to current directory button at the bottom of the screen to start the upload process.
Step 5: Select Files for Upload
- A window with up to eight (8) file fields will appear. Click on the Browse button next to each field to select the files you want to upload from your computer.
- If you need to upload more than eight files at once, click on Upload Even More Files to add additional file fields.
Step 6: Upload the Files
- After selecting the files, click the Upload Files button to begin the upload process. The files will start uploading to your chosen directory.
Important Notes
- Make sure your files are ready for upload and properly named.
- If uploading large files, consider using FTP or splitting uploads into smaller batches for faster processing.
Need Help?
If you run into any issues or have questions about uploading files, feel free to contact our support team for assistance.


