Changing DNS Settings in DirectAdmin
DirectAdmin allows users to modify DNS settings for their domain to manage records like A, CNAME, NS, MX, and PTR. Follow this guide to understand how to change DNS settings effectively.
Step-by-Step Instructions
Step 1: Access the DNS Management Menu
- Log in to your DirectAdmin control panel.
- Navigate to the Account Manager section.
- Click on DNS Management to access the DNS settings for your domain.

Step 2: Understanding DNS Records
-
DNS Table Overview:
- The DNS table displays all current records for your domain.
- Familiarize yourself with the format and structure of existing entries before making changes.
-
Hostname Entry Formats:
- DirectAdmin accepts two formats for hostnames:
- Full Hostname: Includes the full domain name followed by a period (e.g.,
full.hostname.com.). - Subdomain Only: Use the subdomain without the full domain (e.g.,
full).
- Full Hostname: Includes the full domain name followed by a period (e.g.,
- Example:
- Record can be entered as:
admin A 216.194.67.119 - Or:
admin.site-helper.com. A 216.194.67.119
- Record can be entered as:
- Both formats achieve the same result.
- DirectAdmin accepts two formats for hostnames:
Step 3: Changing a DNS Record

-
Locate the Record:
- Find the specific DNS record you want to modify in the table.
-
Edit the Details:
- Click on the Edit or Modify option next to the record.
- Update the Name, Type, Value, or TTL fields as needed.
-
Save Changes:
- Click Save or Update to apply the modifications.
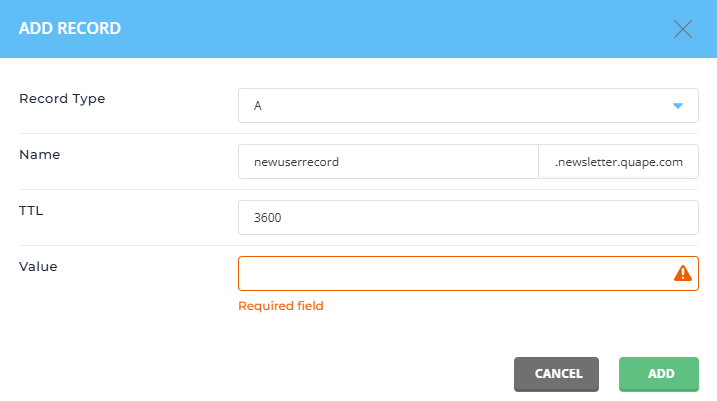
Step 4: Adding a New Record

- If you need to add a new DNS record:
- Scroll to the Add Record section.
- Select the record type (e.g., A, CNAME, MX, etc.).
- Enter the required information:
- Name: Subdomain or full hostname.
- Type: Record type (A, CNAME, etc.).
- Value: Data associated with the record (e.g., IP address or target domain).
- TTL: Optional; leave as default if unsure.
- Click Add to save the new record.
Step 5: Verify and Propagate Changes
- Check Your Entries:
- Review the updated table to ensure the changes have been applied correctly.
- Wait for Propagation:
- DNS changes may take some time to propagate globally, depending on TTL values.
- Test DNS Settings:
- Use tools like
nslookup,dig, or online DNS checkers to verify the new settings.
- Use tools like
Important Notes
- Guidance from Existing Records:
- If unsure how to enter a record, refer to existing entries in the DNS table for formatting examples.
- Backup Records:
- Before making significant changes, consider backing up existing records in case you need to restore them.
- Permissions:
- Ensure you have sufficient permissions to make DNS changes. If not, contact your hosting provider or administrator.
- DNS Best Practices:
- Incorrect DNS settings can disrupt services (e.g., website or email). Double-check changes to avoid issues.


