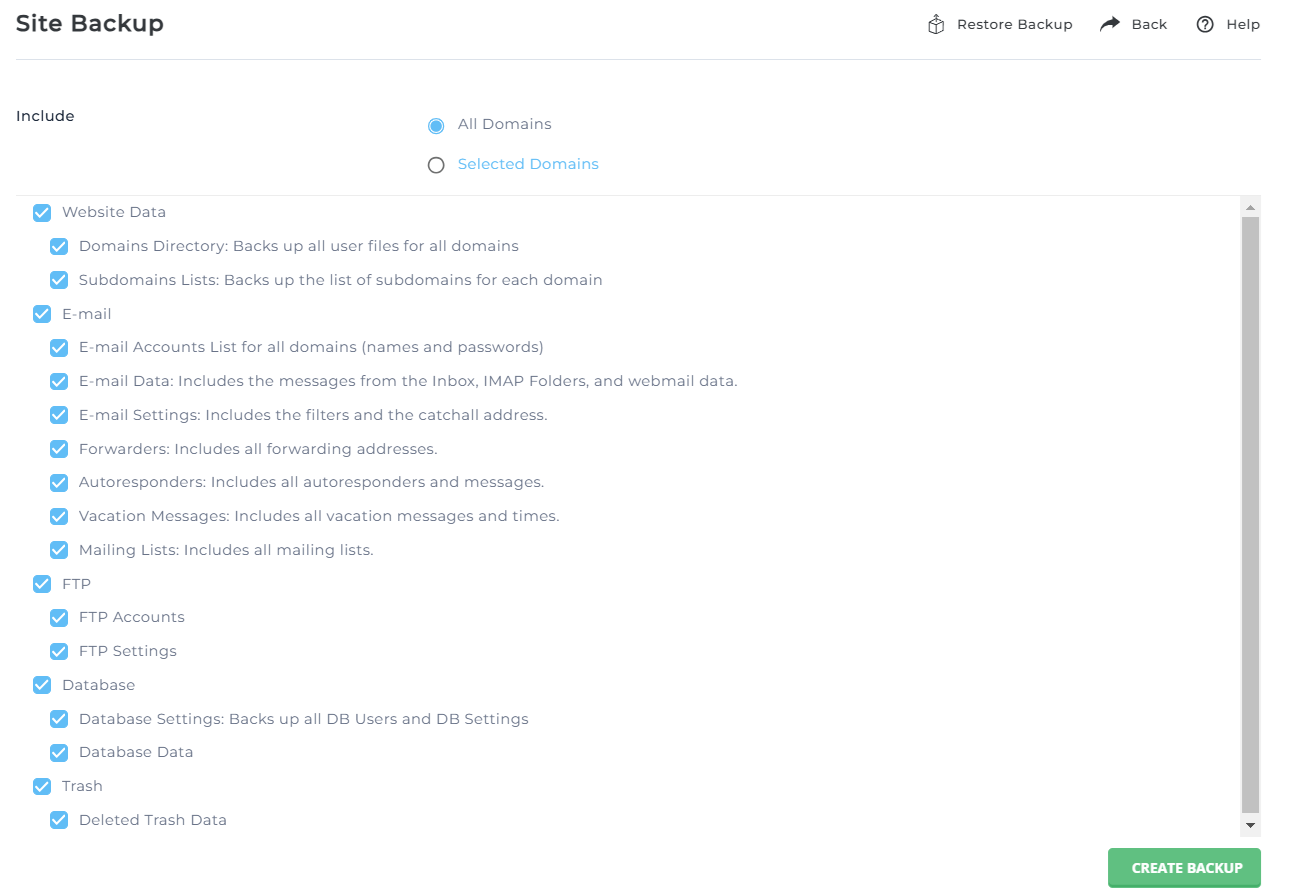
Creating Backups Using DirectAdmin's Site Backup Tool
DirectAdmin provides a straightforward way to back up your website data, email settings, databases, and more. Here's how you can create a backup and manage your backup files:
Step 1: Select Items to Back Up

-
Log in to your DirectAdmin control panel and navigate to the Site Backup menu.
-
Place a checkmark next to the items you wish to back up. Refer to the Choosing What to Save section for detailed descriptions of each backup option.

Step 2: Create the Backup
-
After selecting the items, click the Create Backup button.
-
DirectAdmin will display a success message, such as: “Backup creation added to the queue.”
- Once the backup is generated, a message will appear in the DirectAdmin Panel under:
Support & Help Section ? Support Center.


Step 3: Download the Backup File
-
Navigate to the File Manager in your DirectAdmin panel.

- Open the backups directory, where the backup file is stored.
- Download the backup file to your local computer for safekeeping.

Understanding Backup File Naming
- The format of the backup file is:
[backup]-[Month]-[Day]-[Year]-[Backup Number] - Examples:
backup-May-15-2003-1.tar.gz(First backup of May 15, 2003)backup-May-15-2003-2.tar.gz(Second backup of the same day)backup-May-15-2003-3.tar.gz(Third backup of the same day)
This naming convention ensures you won’t accidentally overwrite previous backups.
Additional Tips
- Verify Backup Contents: After downloading, test the backup file by extracting it to confirm it contains all the necessary data.
- Store Safely: Save backups in multiple locations (e.g., local computer, cloud storage) to avoid data loss.
- Schedule Regular Backups: To keep your data secure, create backups periodically based on the frequency of updates to your website.
- Clean Old Backups: Delete outdated backups to save server storage space.


