Restoring Backups Using DirectAdmin's Site Backup Tool
DirectAdmin's backup restoration tool allows you to easily restore your website data, email settings, and databases. Here's a step-by-step guide to restoring backups effectively:
Step 1: Upload the Backup File (If Needed)
-
If the backup file is stored on your computer, you need to upload it to your server.
-
Use one of the following methods to upload the file to the /backups directory:
-
Via FTP: Connect to your server using an FTP client and upload the file to the
/backupsdirectory. -
Via File Manager:
-
Navigate to the File Manager in DirectAdmin.
-
Go to the /backups directory.
-
Click Upload files to current directory and select your backup file.
-
-

Step 2: Select the Backup File to Restore

-
Go to the Site Backup menu in DirectAdmin.
-
From the dropdown menu, select the backup file you want to restore.
-
The list displays all available backup files in the /backups directory.
-

-
Click the Select Restore Options button to proceed.

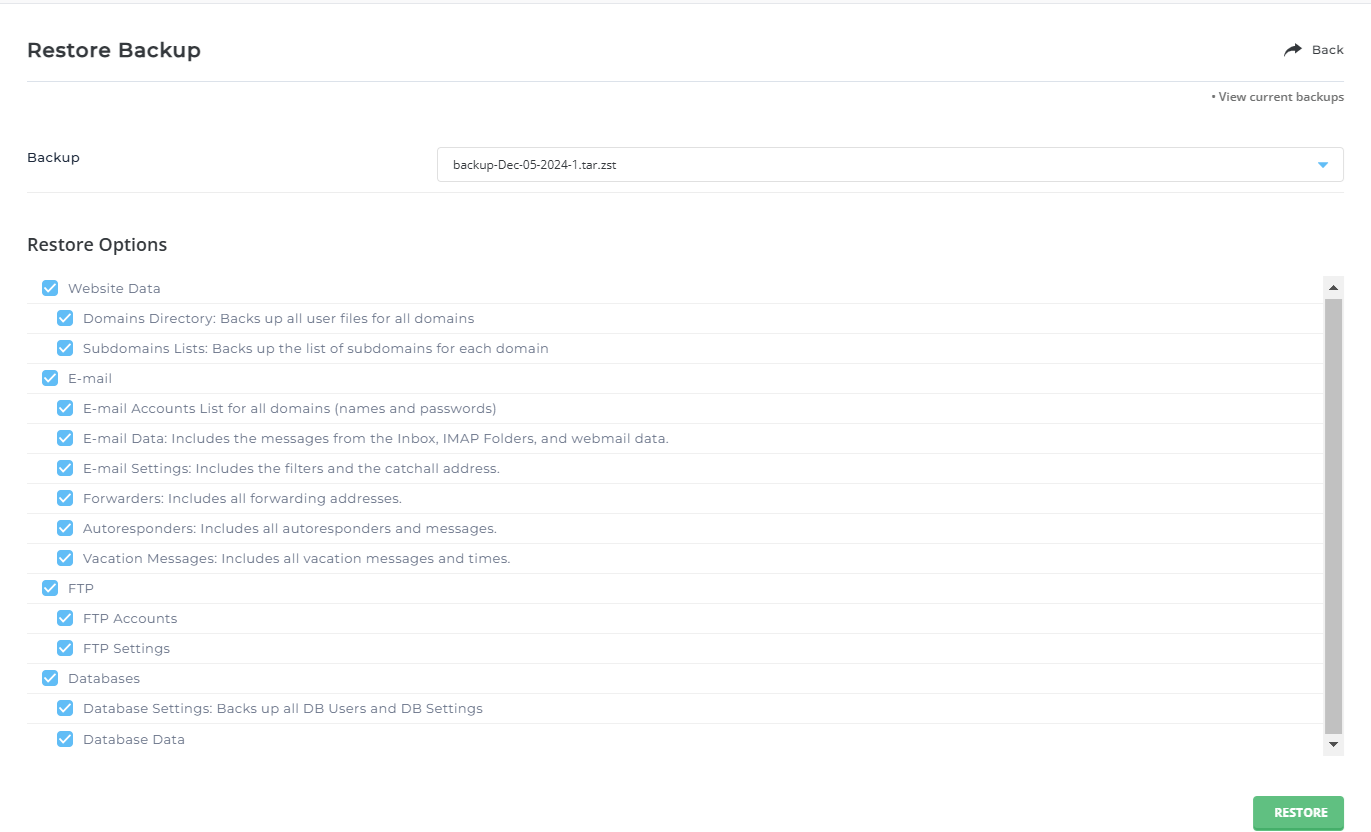
Step 3: Choose Items to Restore
-
On the restore options screen, you’ll see a list of items included in the backup file.
-
Items that were not backed up will appear as grayed-out checkboxes.
-
-
Select the items you want to restore.
-
For example, you can choose to restore all email items while skipping vacation messages.
-
-
Click the Restore Selected Items button to begin the restoration process.
Completion and Confirmation
- If the restore is successful, you will be redirected to the main backup menu, and a success message will be displayed.
Recommended: Insert a screenshot of the success message here.
Additional Notes
- Backup Location: Ensure the backup file is stored in the /backups directory for it to appear in the restoration options.
- Partial Restoration: You can restore specific items (e.g., databases, email settings) without restoring the entire backup.
- Avoid Overwrites: Carefully review the selected items to avoid overwriting existing data unintentionally.


