In this article, you will learn about the basics of adding a product and how to illustrate the different types of products you add to your store. You will also be taught about adding prices and descriptions along with other options and settings while adding products to your store site.
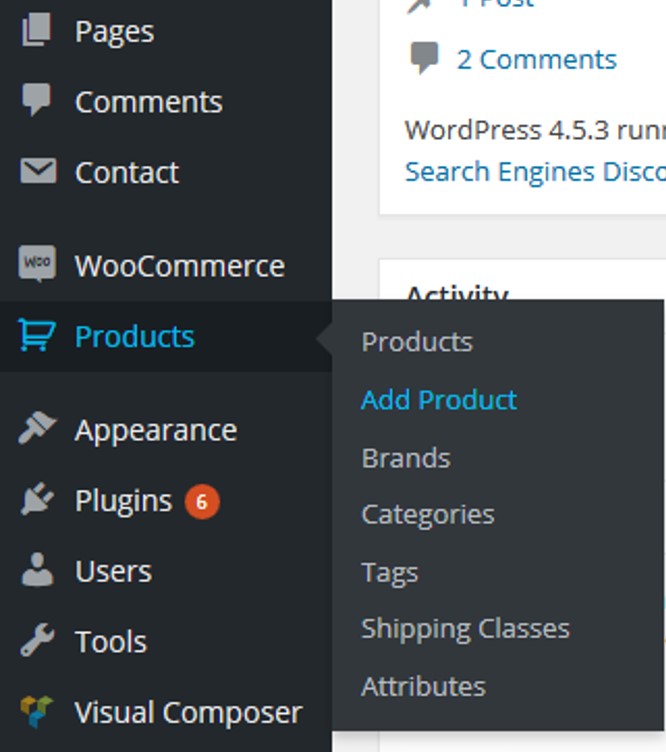
Step 1: At the Dashboard, on the left panel, hover on Products and click Add Product.

Step 2: Once you are on the Add New Product page, type your Product Name in the field. Note: after you enter your product name, the permalink will automatically be generated for you.
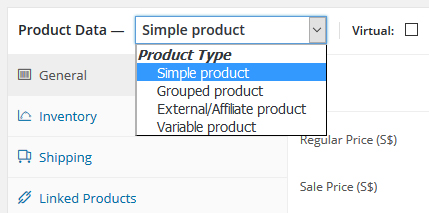
Step 3: Select your Product Data - Type of Product by clicking the drop down menu. The following are the various options available:
- Simple product
- Grouped product (URL)
- External/Affiliate product
- Variable product

Step 4: On the General tab, enter your Stock Keeping Unit (SKU) if applicable, Regular price and Sales price. On the right of the sales price, click on schedule to set a time frame for your product sales date.

Step 5: For the Inventory tab, you may select manage stocks to view more stocks settings. Most importantly, enter your product quantity and set your stock status.

Step 6: Next is the Shipping tab. Enter your product weight, dimensions and its shipping class.

Step 7: On the Linked Products tab, there are Up-sells and Cross-sells.
Up-sells are shown on the product details page. These are products you recommend or encourage visitors to purchase based on the current product they are viewing. For example, if the visitor is viewing a shoe product page, you may want to display socks or bottoms at the same page as an up-sell. In addition, the product could be more profitable, more expensive or possess a better quality to use as an up-sell.
Cross-sells are products shown with the cart and linked to the visitor's cart contents. An example could be the visitor added a mobile phone or tablet to their cart, you cross-sell and suggest that they purchase a phone cover or a portable power charger when they arrive at the cart page.

Step 8: Enter specifications and short description for the product. The short description will usually display next to the product image, price and add to cart.
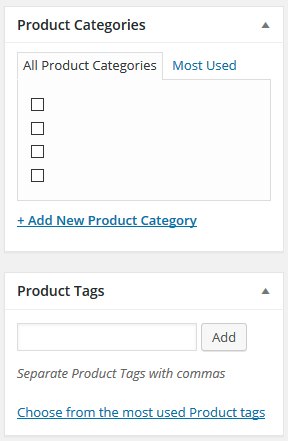
Step 9: On the right side panel, click on a category and assign tags for your product. If you want to create a new category, you can click on +Add New Product Category.

Step 10: To add a featured image, simply click Set product image. Also, you will be able to create Product Galleries as you can showcase your products in different sizes, colors, shapes or pictures taken from diverse angles.
Step 11: Click preview to view and finalized your new product before publishing. Once confirmed, click Publish.
Congratulations! You have added a new product to your WooCommerce site.
Deleting a product
Step 1: Locate the product you wish to delete.
Step 2: Hover the area underneath the Product name and click Trash.
Note: The details shown above were used for demonstration purposes.
If you are unsure on a particular field, kindly locate the "?" icon on the side. A short description will pop-up to explain and assist you on the particular field.
However, if you still require assistance or have any further enquiries, feel free to contact our support team.


