How to Create FTP Accounts on DirectAdmin
FTP (File Transfer Protocol) accounts allow users to upload, manage, and organize files on your server through an FTP client. DirectAdmin enables you to create multiple FTP accounts with varying levels of access. Follow this guide to set up and manage FTP accounts.
Steps to Create FTP Accounts
Step 1: Login to DirectAdmin.

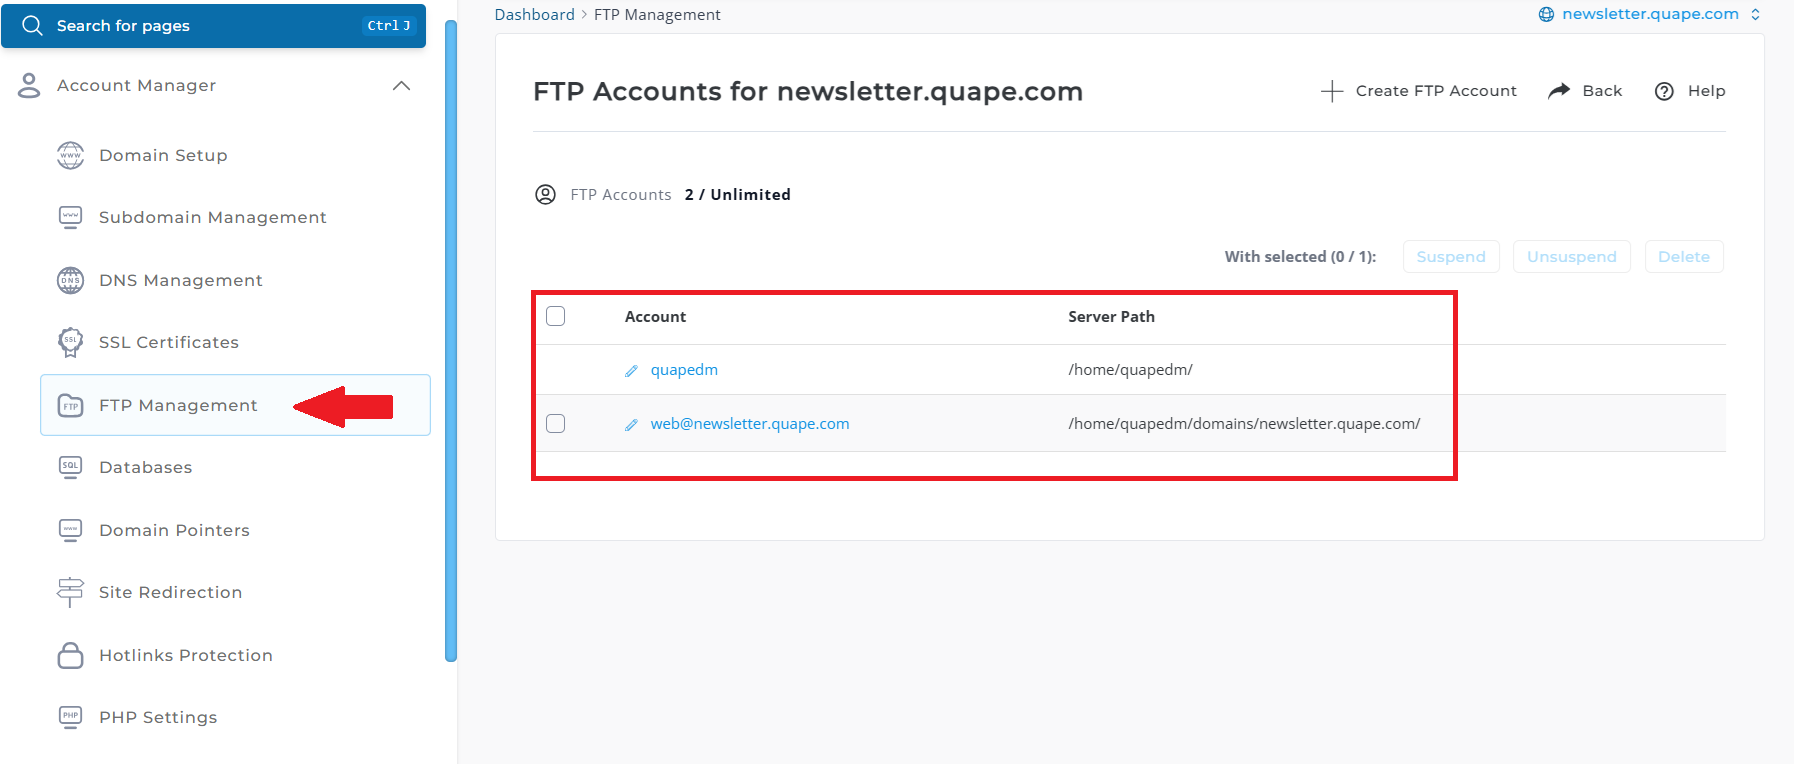
Step 2: Navigate to FTP Management
-
From the Your Account panel, click on FTP Management.
- Here, you'll see a list of existing FTP accounts.
-
The default FTP account (linked to your control panel login) will always appear here.
- Note: The default FTP account password is the same as your DirectAdmin control panel password unless manually updated.

Step 3: Create a New FTP Account

-
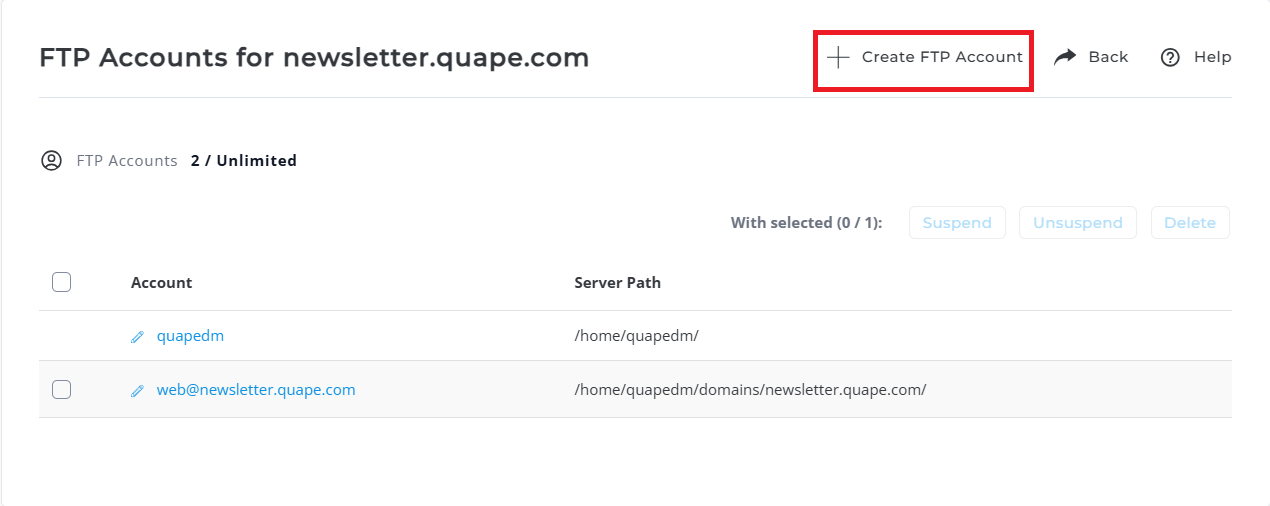
Click the Create FTP Account button.
-
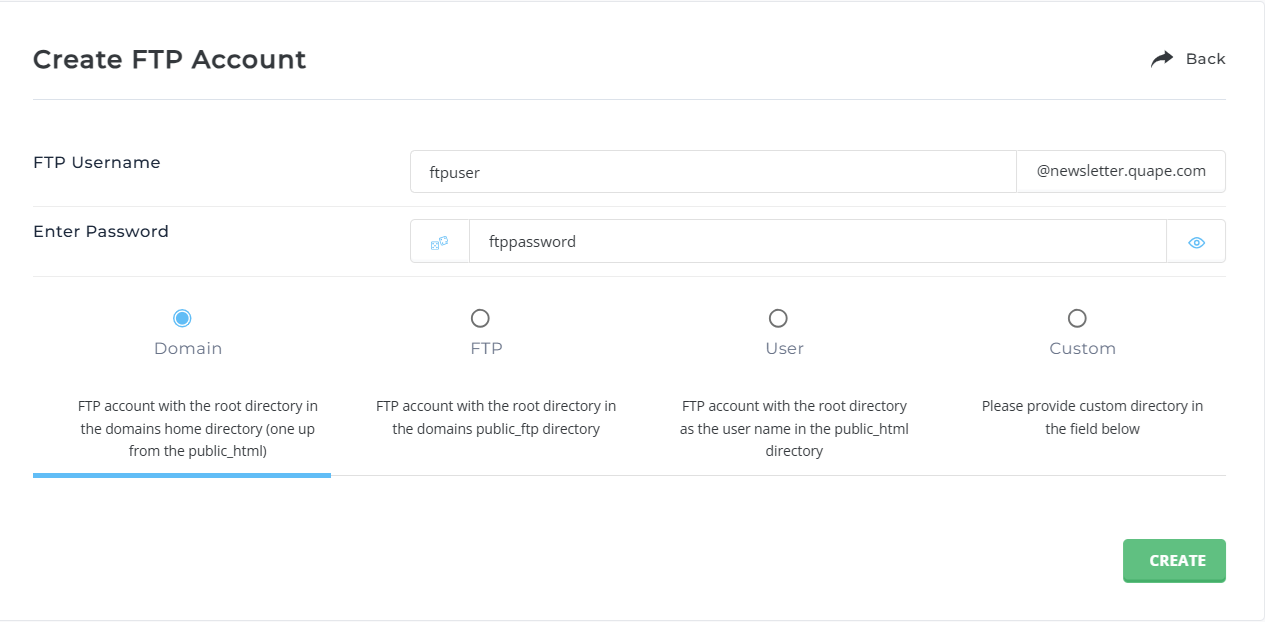
Fill in the following details:
- Username: Enter the desired FTP username.
- Password: Set a secure password or click Random to let DirectAdmin generate one.
-
Select the Access Level for the New Account:
- Domain: Grants access to all major directories (
public_html,private_html,mail, etc.). - FTP: Grants access only to the
public_ftpdirectory (useful for public-facing uploads). - User: Grants access to a subdirectory named after the username within
public_html. For example, an account named gary will have access topublic_html/gary/.- If this directory does not exist, DirectAdmin will create it automatically.
- Custom: Allows you to manually specify a directory for the user. This is useful for custom setups.
- Domain: Grants access to all major directories (

Step 4: Finalize the FTP Account Creation
-
Once all the fields are filled out, click Create.
-
After creation, DirectAdmin will display the FTP account’s credentials:
- Username: For shared IP addresses, the username will include your domain name (e.g.,
user@yourdomain.com). - Password: The one you created or generated.
- FTP Server Address: Use
ftp.yourdomain.comto connect. - Port: Default is
21.
- Username: For shared IP addresses, the username will include your domain name (e.g.,
-
If the account uses a dedicated IP, the username will not include
@yourdomain.com. Additional domains created on the same account will have FTP usernames formatted asuser@thatdomain.com.
Step 5: Logging into Your FTP Account
To access your server via FTP:
-
Download and install an FTP client (e.g., FileZilla, Cyberduck, or WinSCP).
-
Open the client and input the following details:
- Host:
ftp.yourdomain.com - Username: Your FTP account username.
- Password: The password associated with the account.
- Port:
21(default).
- Host:
-
Once connected, you can upload, download, and manage files within the account’s specified directory.
Managing FTP Accounts
In the FTP Management section, you can:
- Edit Passwords: Update the password for any FTP account, including the default account.
- Delete Accounts: Remove unnecessary FTP accounts (except the default account).
Tips for Using FTP Accounts
- Always set strong passwords to secure access.
- Use the Custom access level if users need restricted access to specific directories.
- Regularly monitor and delete unused accounts to maintain security.
If you have any further questions or need assistance, feel free to contact our support team!


